Thursday, September 28, 2023

Amazon Bedrock Is Now Generally Available – Build and Scale Generative AI Applications with Foundation Models

This April, we announced Amazon Bedrock as part of a set of new tools for building with generative AI on AWS. Amazon Bedrock is a fully managed service that offers a choice of high-performing foundation models (FMs) from leading AI companies, including AI21 Labs, Anthropic, Cohere, Stability AI, and Amazon, along with a broad set of capabilities to build generative AI applications, simplifying the development while maintaining privacy and security.

Today, I’m happy to announce that Amazon Bedrock is now generally available! I’m also excited to share that Meta’s Llama 2 13B and 70B parameter models will soon be available on Amazon Bedrock.

Amazon Bedrock

Amazon Bedrock’s comprehensive capabilities help you experiment with a variety of top FMs, customize them privately with your data using techniques such as fine-tuning and retrieval-augmented generation (RAG), and create managed agents that perform complex business tasks—all without writing any code. Check out my previous posts to learn more about agents for Amazon Bedrock and how to connect FMs to your company’s data sources.

Note that some capabilities, such as agents for Amazon Bedrock, including knowledge bases, continue to be available in preview. I’ll share more details on what capabilities continue to be available in preview towards the end of this blog post.

Since Amazon Bedrock is serverless, you don’t have to manage any infrastructure, and you can securely integrate and deploy generative AI capabilities into your applications using the AWS services you are already familiar with.

Amazon Bedrock is integrated with Amazon CloudWatch and AWS CloudTrail to support your monitoring and governance needs. You can use CloudWatch to track usage metrics and build customized dashboards for audit purposes. With CloudTrail, you can monitor API activity and troubleshoot issues as you integrate other systems into your generative AI applications. Amazon Bedrock also allows you to build applications that are in compliance with the GDPR and you can use Amazon Bedrock to run sensitive workloads regulated under the U.S. Health Insurance Portability and Accountability Act (HIPAA).

Get Started with Amazon Bedrock
You can access available FMs in Amazon Bedrock through the AWS Management Console, AWS SDKs, and open-source frameworks such as LangChain.

In the Amazon Bedrock console, you can browse FMs and explore and load example use cases and prompts for each model. First, you need to enable access to the models. In the console, select Model access in the left navigation pane and enable the models you would like to access. Once model access is enabled, you can try out different models and inference configuration settings to find a model that fits your use case.

For example, here’s a contract entity extraction use case example using Cohere’s Command model:

Amazon Bedrock

The example shows a prompt with a sample response, the inference configuration parameter settings for the example, and the API request that runs the example. If you select Open in Playground, you can explore the model and use case further in an interactive console experience.

Amazon Bedrock offers chat, text, and image model playgrounds. In the chat playground, you can experiment with various FMs using a conversational chat interface. The following example uses Anthropic’s Claude model:

Amazon Bedrock

As you evaluate different models, you should try various prompt engineering techniques and inference configuration parameters. Prompt engineering is a new and exciting skill focused on how to better understand and apply FMs to your tasks and use cases. Effective prompt engineering is about crafting the perfect query to get the most out of FMs and obtain proper and precise responses. In general, prompts should be simple, straightforward, and avoid ambiguity. You can also provide examples in the prompt or encourage the model to reason through more complex tasks.

Inference configuration parameters influence the response generated by the model. Parameters such as Temperature, Top P, and Top K give you control over the randomness and diversity, and Maximum Length or Max Tokens control the length of model responses. Note that each model exposes a different but often overlapping set of inference parameters. These parameters are either named the same between models or similar enough to reason through when you try out different models.

We discuss effective prompt engineering techniques and inference configuration parameters in more detail in week 1 of the Generative AI with Large Language Models on-demand course, developed by AWS in collaboration with DeepLearning.AI. You can also check the Amazon Bedrock documentation and the model provider’s respective documentation for additional tips.

Next, let’s see how you can interact with Amazon Bedrock via APIs.

Using the Amazon Bedrock API
Working with Amazon Bedrock is as simple as selecting an FM for your use case and then making a few API calls. In the following code examples, I’ll use the AWS SDK for Python (Boto3) to interact with Amazon Bedrock.

List Available Foundation Models
First, let’s set up the boto3 client and then use list_foundation_models() to see the most up-to-date list of available FMs:

import boto3
import json

bedrock = boto3.client(
    service_name='bedrock', 
    region='us-east-1'
)

bedrock.list_foundation_models()

Run Inference Using Amazon Bedrock’s InvokeModel API
Next, let’s perform an inference request using Amazon Bedrock’s InvokeModel API and boto3 runtime client. The runtime client manages the data plane APIs, including the InvokeModel API.

Amazon Bedrock

The InvokeModel API expects the following parameters:

{
    "modelId": <MODEL_ID>,
    "contentType": "application/json",
    "accept": "application/json",
    "body": <BODY>
}

The modelId parameter identifies the FM you want to use. The request body is a JSON string containing the prompt for your task, together with any inference configuration parameters. Note that the prompt format will vary based on the selected model provider and FM. The contentType and accept parameters define the MIME type of the data in the request body and response and default to application/json. For more information on the latest models, InvokeModel API parameters, and prompt formats, see the Amazon Bedrock documentation.

Example: Text Generation Using AI21 Lab’s Jurassic-2 Model
Here is a text generation example using AI21 Lab’s Jurassic-2 Ultra model. I’ll ask the model to tell me a knock-knock joke—my version of a Hello World.

bedrock_runtime = boto3.client(
    service_name='bedrock-runtime', 
    region='us-east-1'
)

modelId = 'ai21.j2-ultra-v1' 
accept = 'application/json'
contentType = 'application/json'

body = json.dumps(
    {"prompt": "Knock, knock!", 
     "maxTokens": 200,
     "temperature": 0.7,
     "topP": 1,
    }
)

response = bedrock_runtime.invoke_model(
    body=body, 
        modelId=modelId, 
        accept=accept, 
        contentType=contentType
)

response_body = json.loads(response.get('body').read())

Here’s the response:

outputText = response_body.get('completions')[0].get('data').get('text')
print(outputText)
Who's there? 
Boo! 
Boo who? 
Don't cry, it's just a joke!

You can also use the InvokeModel API to interact with embedding models.

Example: Create Text Embeddings Using Amazon’s Titan Embeddings Model
Text embedding models translate text inputs, such as words, phrases, or possibly large units of text, into numerical representations, known as embedding vectors. Embedding vectors capture the semantic meaning of the text in a high-dimension vector space and are useful for applications such as personalization or search. In the following example, I’m using the Amazon Titan Embeddings model to create an embedding vector.

prompt = "Knock-knock jokes are hilarious."

body = json.dumps({
    "inputText": prompt,
})

model_id = 'amazon.titan-embed-g1-text-02'
accept = 'application/json' 
content_type = 'application/json'

response = bedrock_runtime.invoke_model(
    body=body, 
    modelId=model_id, 
    accept=accept, 
    contentType=content_type
)

response_body = json.loads(response['body'].read())
embedding = response_body.get('embedding')

The embedding vector (shortened) will look similar to this:

[0.82421875, -0.6953125, -0.115722656, 0.87890625, 0.05883789, -0.020385742, 0.32421875, -0.00078201294, -0.40234375, 0.44140625, ...]

Note that Amazon Titan Embeddings is available today. The Amazon Titan Text family of models for text generation continues to be available in limited preview.

Run Inference Using Amazon Bedrock’s InvokeModelWithResponseStream API
The InvokeModel API request is synchronous and waits for the entire output to be generated by the model. For models that support streaming responses, Bedrock also offers an InvokeModelWithResponseStream API that lets you invoke the specified model to run inference using the provided input but streams the response as the model generates the output.

Amazon Bedrock

Streaming responses are particularly useful for responsive chat interfaces to keep the user engaged in an interactive application. Here is a Python code example using Amazon Bedrock’s InvokeModelWithResponseStream API:

response = bedrock_runtime.invoke_model_with_response_stream(
    modelId=modelId, 
    body=body)

stream = response.get('body')
if stream:
    for event in stream:
        chunk=event.get('chunk')
        if chunk:
            print(json.loads(chunk.get('bytes').decode))

Data Privacy and Network Security
With Amazon Bedrock, you are in control of your data, and all your inputs and customizations remain private to your AWS account. Your data, such as prompts, completions, and fine-tuned models, is not used for service improvement. Also, the data is never shared with third-party model providers.

Your data remains in the Region where the API call is processed. All data is encrypted in transit with a minimum of TLS 1.2 encryption. Data at rest is encrypted with AES-256 using AWS KMS managed data encryption keys. You can also use your own keys (customer managed keys) to encrypt the data.

You can configure your AWS account and virtual private cloud (VPC) to use Amazon VPC endpoints (built on AWS PrivateLink) to securely connect to Amazon Bedrock over the AWS network. This allows for secure and private connectivity between your applications running in a VPC and Amazon Bedrock.

Governance and Monitoring
Amazon Bedrock integrates with IAM to help you manage permissions for Amazon Bedrock. Such permissions include access to specific models, playground, or features within Amazon Bedrock. All AWS-managed service API activity, including Amazon Bedrock activity, is logged to CloudTrail within your account.

Amazon Bedrock emits data points to CloudWatch using the AWS/Bedrock namespace to track common metrics such as InputTokenCount, OutputTokenCount, InvocationLatency, and (number of) Invocations. You can filter results and get statistics for a specific model by specifying the model ID dimension when you search for metrics. This near real-time insight helps you track usage and cost (input and output token count) and troubleshoot performance issues (invocation latency and number of invocations) as you start building generative AI applications with Amazon Bedrock.

Billing and Pricing Models
Here are a couple of things around billing and pricing models to keep in mind when using Amazon Bedrock:

Billing – Text generation models are billed per processed input tokens and per generated output tokens. Text embedding models are billed per processed input tokens. Image generation models are billed per generated image.

Pricing Models – Amazon Bedrock offers two pricing models, on-demand and provisioned throughput. On-demand pricing allows you to use FMs on a pay-as-you-go basis without having to make any time-based term commitments. Provisioned throughput is primarily designed for large, consistent inference workloads that need guaranteed throughput in exchange for a term commitment. Here, you specify the number of model units of a particular FM to meet your application’s performance requirements as defined by the maximum number of input and output tokens processed per minute. For detailed pricing information, see Amazon Bedrock Pricing.

Now Available
Amazon Bedrock is available today in AWS Regions US East (N. Virginia) and US West (Oregon). To learn more, visit Amazon Bedrock, check the Amazon Bedrock documentation, explore the generative AI space at community.aws, and get hands-on with the Amazon Bedrock workshop. You can send feedback to AWS re:Post for Amazon Bedrock or through your usual AWS contacts.

(Available in Preview) The Amazon Titan Text family of text generation models, Stability AI’s Stable Diffusion XL image generation model, and agents for Amazon Bedrock, including knowledge bases, continue to be available in limited preview. Reach out through your usual AWS contacts if you’d like access.

(Coming Soon) The Llama 2 13B and 70B parameter models by Meta will soon be available via Amazon Bedrock’s fully managed API for inference and fine-tuning.

Start building generative AI applications with Amazon Bedrock, today!

— Antje


from AWS News Blog https://ift.tt/BnxvyLr
via IFTTT

Wednesday, September 27, 2023

Amazon MSK Introduces Managed Data Delivery from Apache Kafka to Your Data Lake

I’m excited to announce today a new capability of Amazon Managed Streaming for Apache Kafka (Amazon MSK) that allows you to continuously load data from an Apache Kafka cluster to Amazon Simple Storage Service (Amazon S3). We use Amazon Kinesis Data Firehose—an extract, transform, and load (ETL) service—to read data from a Kafka topic, transform the records, and write them to an Amazon S3 destination. Kinesis Data Firehose is entirely managed and you can configure it with just a few clicks in the console. No code or infrastructure is needed.

Kafka is commonly used for building real-time data pipelines that reliably move massive amounts of data between systems or applications. It provides a highly scalable and fault-tolerant publish-subscribe messaging system. Many AWS customers have adopted Kafka to capture streaming data such as click-stream events, transactions, IoT events, and application and machine logs, and have applications that perform real-time analytics, run continuous transformations, and distribute this data to data lakes and databases in real time.

However, deploying Kafka clusters is not without challenges.

The first challenge is to deploy, configure, and maintain the Kafka cluster itself. This is why we released Amazon MSK in May 2019. MSK reduces the work needed to set up, scale, and manage Apache Kafka in production. We take care of the infrastructure, freeing you to focus on your data and applications. The second challenge is to write, deploy, and manage application code that consumes data from Kafka. It typically requires coding connectors using the Kafka Connect framework and then deploying, managing, and maintaining a scalable infrastructure to run the connectors. In addition to the infrastructure, you also must code the data transformation and compression logic, manage the eventual errors, and code the retry logic to ensure no data is lost during the transfer out of Kafka.

Today, we announce the availability of a fully managed solution to deliver data from Amazon MSK to Amazon S3 using Amazon Kinesis Data Firehose. The solution is serverless–there is no server infrastructure to manage–and requires no code. The data transformation and error-handling logic can be configured with a few clicks in the console.

The architecture of the solution is illustrated by the following diagram.

Amazon MSK to Amazon S3 architecture diagram

Amazon MSK is the data source, and Amazon S3 is the data destination while Amazon Kinesis Data Firehose manages the data transfer logic.

When using this new capability, you no longer need to develop code to read your data from Amazon MSK, transform it, and write the resulting records to Amazon S3. Kinesis Data Firehose manages the reading, the transformation and compression, and the write operations to Amazon S3. It also handles the error and retry logic in case something goes wrong. The system delivers the records that can not be processed to the S3 bucket of your choice for manual inspection. The system also manages the infrastructure required to handle the data stream. It will scale out and scale in automatically to adjust to the volume of data to transfer. There are no provisioning or maintenance operations required on your side.

Kinesis Data Firehose delivery streams support both public and private Amazon MSK provisioned or serverless clusters. It also supports cross-account connections to read from an MSK cluster and to write to S3 buckets in different AWS accounts. The Data Firehose delivery stream reads data from your MSK cluster, buffers the data for a configurable threshold size and time, and then writes the buffered data to Amazon S3 as a single file. MSK and Data Firehose must be in the same AWS Region, but Data Firehose can deliver data to Amazon S3 buckets in other Regions.

Kinesis Data Firehose delivery streams can also convert data types. It has built-in transformations to support JSON to Apache Parquet and Apache ORC formats. These are columnar data formats that save space and enable faster queries on Amazon S3. For non-JSON data, you can use AWS Lambda to transform input formats such as CSV, XML, or structured text into JSON before converting the data to Apache Parquet/ORC. Additionally, you can specify data compression formats from Data Firehose, such as GZIP, ZIP, and SNAPPY, before delivering the data to Amazon S3, or you can deliver the data to Amazon S3 in its raw form.

Let’s See How It Works
To get started, I use an AWS account where there’s an Amazon MSK cluster already configured and some applications streaming data to it. To get started and to create your first Amazon MSK cluster, I encourage you to read the tutorial.

Amazon MSK - List of existing clusters

For this demo, I use the console to create and configure the data delivery stream. Alternatively, I can use the AWS Command Line Interface (AWS CLI), AWS SDKs, AWS CloudFormation, or Terraform.

I navigate to the Amazon Kinesis Data Firehose page of the AWS Management Console and then choose Create delivery stream.

Kinesis Data Firehose - Main console page

I select Amazon MSK as a data Source and Amazon S3 as a delivery Destination. For this demo, I want to connect to a private cluster, so I select Private bootstrap brokers under Amazon MSK cluster connectivity.

I need to enter the full ARN of my cluster. Like most people, I cannot remember the ARN, so I choose Browse and select my cluster from the list.

Finally, I enter the cluster Topic name I want this delivery stream to read from.

Configure the delivery stream

After the source is configured, I scroll down the page to configure the data transformation section.

On the Transform and convert records section, I can choose whether I want to provide my own Lambda function to transform records that aren’t in JSON or to transform my source JSON records to one of the two available pre-built destination data formats: Apache Parquet or Apache ORC.

Apache Parquet and ORC formats are more efficient than JSON format to query data from Amazon S3. You can select these destination data formats when your source records are in JSON format. You must also provide a data schema from a table in AWS Glue.

These built-in transformations optimize your Amazon S3 cost and reduce time-to-insights when downstream analytics queries are performed with Amazon Athena, Amazon Redshift Spectrum, or other systems.

Configure the data transformation in the delivery stream

Finally, I enter the name of the destination Amazon S3 bucket. Again, when I cannot remember it, I use the Browse button to let the console guide me through my list of buckets. Optionally, I enter an S3 bucket prefix for the file names. For this demo, I enter aws-news-blog. When I don’t enter a prefix name, Kinesis Data Firehose uses the date and time (in UTC) as the default value.

Under the Buffer hints, compression and encryption section, I can modify the default values for buffering, enable data compression, or select the KMS key to encrypt the data at rest on Amazon S3.

When ready, I choose Create delivery stream. After a few moments, the stream status changes to ✅  available.

Select the destination S3 bucket

Assuming there’s an application streaming data to the cluster I chose as a source, I can now navigate to my S3 bucket and see data appearing in the chosen destination format as Kinesis Data Firehose streams it.

S3 bucket browsers shows the files streamed from MSK

As you see, no code is required to read, transform, and write the records from my Kafka cluster. I also don’t have to manage the underlying infrastructure to run the streaming and transformation logic.

Pricing and Availability.
This new capability is available today in all AWS Regions where Amazon MSK and Kinesis Data Firehose are available.

You pay for the volume of data going out of Amazon MSK, measured in GB per month. The billing system takes into account the exact record size; there is no rounding. As usual, the pricing page has all the details.

I can’t wait to hear about the amount of infrastructure and code you’re going to retire after adopting this new capability. Now go and configure your first data stream between Amazon MSK and Amazon S3 today.

-- seb

from AWS News Blog https://ift.tt/Nu1zdRm
via IFTTT

Tuesday, September 26, 2023

Monday, September 25, 2023

AWS Weekly Roundup: Amazon EC2 M2 Pro Mac, Amazon Coretto 21, Amazon CloudWatch Synthetics, and more (Sept. 25, 2023)

This week, I’m in Jakarta to support AWS User Group Indonesia and AWS Cloud Day Indonesia. Yesterday, I attended a community event – a collaboration between AWS User Group Indonesia and Hacktiv8 with “Innovating Yourself as Early-Stage Developers” as the main theme. We had a blast and I had a wonderful time connecting with speakers and developers.

Next up, AWS Cloud Day Indonesia. I’ll be at the Developer Lounge, come and say hi!

Last Week’s Launches
Here are some of the launches that caught my attention last week:

Add Your Swift Packages to AWS CodeArtifact – In this article, Seb describes how Swift developers who write code for Apple platforms (iOS, iPadOS, macOS, tvOS, watchOS, visionOS or Swift) applications running on the server side can use AWS CodeArtifact to securely store and retrieve their package dependencies. What I really like is how developers can still use standard developer tools, such as Xcode, xcodebuild, and the Swift Package Manager (the swift package command) to interact with AWS CodeArtifact and facilitate integration into the development workflow.

Amazon EC2 M2 Pro Mac Instances Built on Apple Silicon M2 Pro Mac Mini Computers – Channy wrote how developers can use Amazon EC2 M2 Pro Mac to run memory intensive builds and test workloads, modernize their CI/CD and accelerate their product time to market. With 2x RAM, 1.5x CPU cores, and more than 2x GPU cores compared to EC2 M1 Mac instances, Apple developers can now run more tests in parallel using multiple Xcode simulators.

Synthetics Python runtime version 2.0 for Amazon CloudWatch Synthetics – With Amazon CloudWatch Synthetics, you can continually verify your customer experience and discover issues before your customers do by creating canaries. Canaries are configurable scripts that run on a schedule, to monitor your endpoints and APIs. In this announcement, you can use Synthetics Python runtime version syn-python-selenium-2.0 to create canaries.

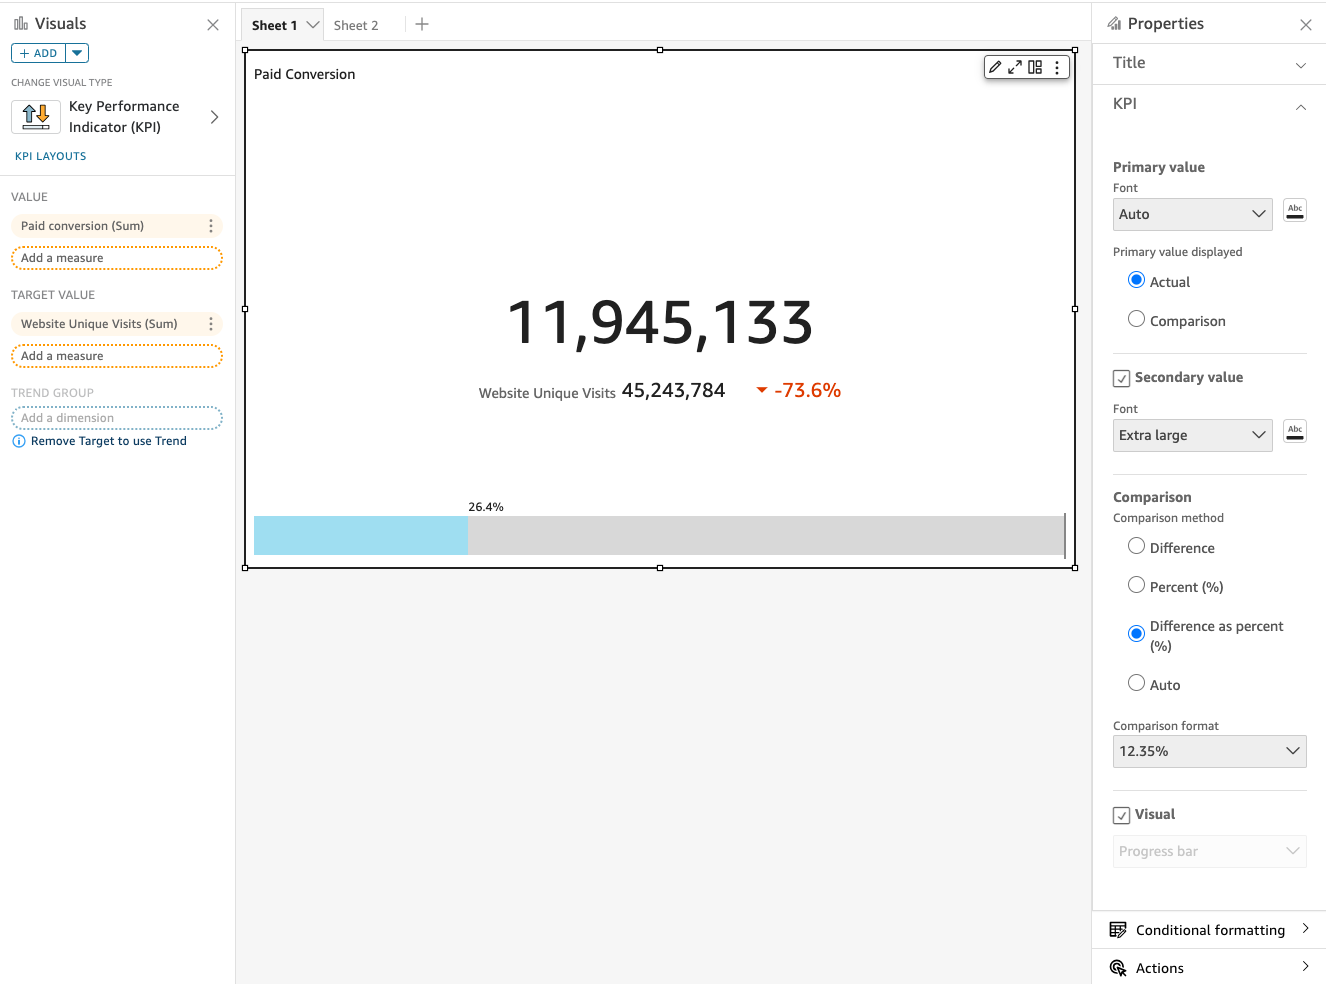
Amazon QuickSight adds new layout and sparkline to KPI visual – Effortlessly design visually appealing KPIs on Amazon Quicksight with these new updates. Quicksight introduces a range of enhancements with user-friendly experience, including templated KPI layouts, support for sparklines, improvements in conditional formatting, and a revamped format pane.

Amazon Location Services announces a price reduction of up to 75 percent for tracking and geofencing – Amazon Location Service just announced a four-tiered pricing model for tracking and geofencing to help you scale and cost-effectively run your operations and business. If you use geofencing, you might see your bill decrease by 20 percent to 70 percent, and tracking by up to 75 percent.

Amazon Corretto 21 is now generally available – Happy news for Java developers. Amazon Coretto 21 with long term support (LTS) is generally available for Linux, Windows and macOS.

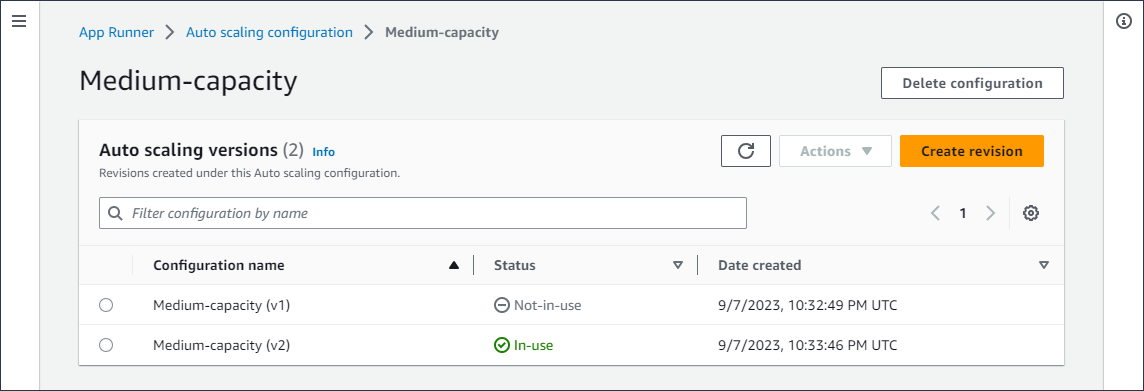
AWS App Runner launches improvements for Auto-Scaling configuration management – Now you can use new APIs and parameters for AWS App Runner service to manage your App Runner services and define your auto-scaling configuration (ASC). For example, setting default ASC, update existing ASC and list all App Runner services that are using an ASC resource.

Amazon SNS message data protection with redaction or masking – With Amazon SNS, now you can discover and protect certain types of personally identifiable information (PII) and protected health information (PHI). You can define your data protection policies and SNS will scan messages in real-time for sensitive data.

Upcoming AWS and Community Events
Check your calendars and sign up for these AWS events:

And let’s learn from our fellow builders and join AWS Community Days:

  • AWS Community Day Zimbabwe (Sept. 30),
  • AWS Community Day Chile (Sept. 30),
  • AWS Community Day Bulgaria Bulgaria (Oct. 7).

Visit the landing page to check out all the upcoming AWS Community Days.

Happy building!
— Donnie

This post is part of our Weekly Roundup series. Check back each week for a quick roundup of interesting news and announcements from AWS!


from AWS News Blog https://ift.tt/PJszigL
via IFTTT

Wednesday, September 20, 2023

New – Add Your Swift Packages to AWS CodeArtifact

Starting today, Swift developers who write code for Apple platforms (iOS, iPadOS, macOS, tvOS, watchOS, or visionOS) or for Swift applications running on the server side can use AWS CodeArtifact to securely store and retrieve their package dependencies. CodeArtifact integrates with standard developer tools such as Xcode, xcodebuild, and the Swift Package Manager (the swift package command).

Simple applications routinely include dozens of packages. Large enterprise applications might have hundreds of dependencies. These packages help developers speed up the development and testing process by providing code that solves common programming challenges such as network access, cryptographic functions, or data format manipulation. Developers also embed SDKs–such as the AWS SDKs–to access remote services. These packages might be produced by other teams in your organization or maintained by third-parties, such as open-source projects. Managing packages and their dependencies is an integral part of the software development process. Modern programming languages include tools to download and resolve dependencies: Maven in Java, NuGet in C#, npm or yarn in JavaScript, and pip in Python just to mention a few. Developers for Apple platforms use CocoaPods or the Swift Package Manager (SwiftPM).

Downloading and integrating packages is a routine operation for application developers. However, it presents at least two significant challenges for organizations.

The first challenge is legal. Organizations must ensure that licenses for third-party packages are compatible with the expected use of licenses for your specific project and that the package doesn’t violate someone else’s intellectual property (IP). The second challenge is security. Organizations must ensure that the included code is safe to use and doesn’t include back doors or intentional vulnerabilities designed to introduce security flaws in your app. Injecting vulnerabilities in popular open-source projects is known as a supply chain attack and has become increasingly popular in recent years.

To address these challenges, organizations typically install private package servers on premises or in the cloud. Developers can only use packages vetted by their organization’s security and legal teams and made available through private repositories.

AWS CodeArtifact is a managed service that allows you to safely distribute packages to your internal teams of developers. There is no need to install, manage, or scale the underlying infrastructure. We take care of that for you, giving you more time to work on your apps instead of the software development infrastructure.

I’m excited to announce that CodeArtifact now supports native Swift packages, in addition to npm, PyPI, Maven, NuGet, and generic package formats. Swift packages are a popular way to package and distribute reusable Swift code elements. To learn how to create your own Swift package, you can follow this tutorial. The community has also created more than 6,000 Swift packages that you can use in your Swift applications.

You can now publish and download your Swift package dependencies from your CodeArtifact repository in the AWS Cloud. CodeArtifact SwiftPM works with existing developer tools such as Xcode, VSCode, and the Swift Package Manager command line tool. After your packages are stored in CodeArtifact, you can reference them in your project’s Package.swift file or in your Xcode project, in a similar way you use Git endpoints to access public Swift packages.

After the configuration is complete, your network-jailed build system will download the packages from the CodeArtifact repository, ensuring that only approved and controlled packages are used during your application’s build process.

How To Get Started
As usual on this blog, I’ll show you how it works. Imagine I’m working on an iOS application that uses Amazon DynamoDB as a database. My application embeds the AWS SDK for Swift as a dependency. To comply with my organization policies, the application must use a specific version of the AWS SDK for Swift, compiled in-house and approved by my organization’s legal and security teams. In this demo, I show you how I prepare my environment, upload the package to the repository, and use this specific package build as a dependency for my project.

For this demo, I focus on the steps specific to Swift packages. You can read the tutorial written by my colleague Steven to get started with CodeArtifact.

I use an AWS account that has a package repository (MySwiftRepo) and domain (stormacq-test) already configured.

CodeArtifact repository

To let SwiftPM acess my CodeArtifact repository, I start by collecting an authentication token from CodeArtifact.

export CODEARTIFACT_AUTH_TOKEN=`aws codeartifact get-authorization-token \
                                     --domain stormacq-test              \
                                     --domain-owner 012345678912         \
                                     --query authorizationToken          \
                                     --output text`

Note that the authentication token expires after 12 hours. I must repeat this command after 12 hours to obtain a fresh token.

Then, I request the repository endpoint. I pass the domain name and domain owner (the AWS account ID). Notice the --format swift option.

export CODEARTIFACT_REPO=`aws codeartifact get-repository-endpoint  \
                               --domain stormacq-test               \
                               --domain-owner 012345678912          \
                               --format swift                       \
                               --repository MySwiftRepo             \
                               --query repositoryEndpoint           \
                               --output text`

Now that I have the repository endpoint and an authentication token, I use the AWS Command Line Interface (AWS CLI) to configure SwiftPM on my machine.

SwiftPM can store the repository configurations at user level (in the file ~/.swiftpm/configurations) or at project level (in the file <your project>/.swiftpm/configurations). By default, the CodeArtifact login command creates a project-level configuration to allow you to use different CodeArtifact repositories for different projects.

I use the AWS CLI to configure SwiftPM on my build machine.

aws codeartifact login          \
    --tool swift                \
    --domain stormacq-test      \
    --repository MySwiftRepo    \
    --namespace aws             \
    --domain-owner 012345678912

The command invokes swift package-registry login with the correct options, which in turn, creates the required SwiftPM configuration files with the given repository name (MySwiftRepo) and scope name (aws).

Now that my build machine is ready, I prepare my organization’s approved version of the AWS SDK for Swift package and then I upload it to the repository.

git clone https://github.com/awslabs/aws-sdk-swift.git
pushd aws-sdk-swift
swift package archive-source
mv aws-sdk-swift.zip ../aws-sdk-swift-0.24.0.zip
popd

Finally, I upload this package version to the repository.

When using Swift 5.9 or more recent, I can upload my package to my private repository using the SwiftPM command:

swift package-registry publish           \
                       aws.aws-sdk-swift \
                       0.24.0            \
                       --verbose

The versions of Swift before 5.9 don’t provide a swift package-registry publish command. So, I use the curl command instead.

curl  -X PUT 
      --user "aws:$CODEARTIFACT_AUTH_TOKEN"               \
      -H "Accept: application/vnd.swift.registry.v1+json" \
      -F source-archive="@aws-sdk-swift-0.24.0.zip"       \
      "${CODEARTIFACT_REPO}aws/aws-sdk-swift/0.24.0"

Notice the format of the package name after the URI of the repository: <scope>/<package name>/<package version>. The package version must follow the semantic versioning scheme.

I can use the CLI or the console to verify that the package is available in the repository.

CodeArtifact List Packages

aws codeartifact list-package-versions      \
                  --domain stormacq-test    \
                  --repository MySwiftRepo  \
                  --format swift            \
                  --namespace aws           \
                  --package aws-sdk-swift
{
    "versions": [
        {
            "version": "0.24.0",
            "revision": "6XB5O65J8J3jkTDZd8RMLyqz7XbxIg9IXpTudP7THbU=",
            "status": "Published",
            "origin": {
                "domainEntryPoint": {
                    "repositoryName": "MySwiftRepo"
                },
                "originType": "INTERNAL"
            }
        }
    ],
    "defaultDisplayVersion": "0.24.0",
    "format": "swift",
    "package": "aws-sdk-swift",
    "namespace": "aws"
}

Now that the package is available, I can use it in my projects as usual.

Xcode uses SwiftPM tools and configuration files I just created. To add a package to my Xcode project, I select the project name on the left pane, and then I select the Package Dependencies tab. I can see the packages that are already part of my project. To add a private package, I choose the + sign under Packages.

Xcode add a package as dependency to a project

On the top right search field, I enter aws.aws-sdk-swift (this is <scope name>.<package name>). After a second or two, the package name appears on the list. On the top right side, you can verify the source repository (next to the Registry label). Before selecting the Add Package button, select the version of the package, just like you do for publicly available packages.

Add a private package from Codeartifact on Xcode

Alternatively, for my server-side or command-line applications, I add the dependency in the Package.swift file. I also use the format (<scope>.<package name>) as the first parameter of .package(id:from:)function.

    dependencies: [
        .package(id: "aws.aws-sdk-swift", from: "0.24.0")
    ],

When I type swift package update, SwiftPM downloads the package from the CodeArtifact repository.

Things to Know
There are some things to keep in mind before uploading your first Swift packages.

  • Be sure to update to the latest version of the CLI before trying any command shown in the preceding instructions.
  • You have to use Swift version 5.8 or newer to use CodeArtifact with the swift package command. On macOS, the Swift toolchain comes with Xcode. Swift 5.8 is available on macOS 13 (Ventura) and Xcode 14. On Linux and Windows, you can download the Swift toolchain from swift.org.
  • You have to use Xcode 15 for your iOS, iPadOS, tvOS, or watchOS applications. I tested this with Xcode 15 beta8.
  • The swift package-registry publish command is available with Swift 5.9 or newer. When you use Swift 5.8, you can use curlto upload your package, as I showed in the demo (or use any HTTP client of your choice).
  • Swift packages have the concept of scope. A scope provides a namespace for related packages within a package repository. Scopes are mapped to CodeArtifact namespaces.
  • The authentication token expires after 12 hours. We suggest writing a script to automate its renewal or using a scheduled AWS Lambda function and securely storing the token in AWS Secrets Manager (for example).

Troubleshooting
If Xcode can not find your private package, double-check the registry configuration in ~/.swiftpm/configurations/registries.json. In particular, check if the scope name is present. Also verify that the authentication token is present in the keychain. The name of the entry is the URL of your repository. You can verify the entries in the keychain with the /Application/Utilities/Keychain Access.app application or using the security command line tool.

security find-internet-password                                                  \
          -s "stormacq-test-012345678912.d.codeartifact.us-west-2.amazonaws.com" \
          -g

Here is the SwiftPM configuration on my machine.

cat ~/.swiftpm/configuration/registries.json

{
  "authentication" : {
    "stormacq-test-012345678912.d.codeartifact.us-west-2.amazonaws.com" : {
      "loginAPIPath" : "/swift/MySwiftRepo/login",
      "type" : "token"
    }
  },
  "registries" : {
    "aws" : { // <-- this is the scope name!
      "url" : "https://stormacq-test-012345678912.d.codeartifact.us-west-2.amazonaws.com/swift/MySwiftRepo/"
    }
  },
  "version" : 1
}

Keychain item for codeartifact authentication token

Pricing and Availability
CodeArtifact costs for Swift packages are the same as for the other package formats already supported. CodeArtifact billing depends on three metrics: the storage (measured in GB per month), the number of requests, and the data transfer out to the internet or to other AWS Regions. Data transfer to AWS services in the same Region is not charged, meaning you can run your CICD jobs on Amazon EC2 Mac instances, for example, without incurring a charge for the CodeArtifact data transfer. As usual, the pricing page has the details.

CodeArtifact for Swift packages is available in all 13 Regions where CodeArtifact is available.

Now go build your Swift applications and upload your private packages to CodeArtifact!

-- seb

PS : Do you know you can write Lambda functions in the Swift programming language? Check the quick start guide or follow this 35-minute tutorial.


from AWS News Blog https://ift.tt/fas0Np3
via IFTTT

Tuesday, September 19, 2023

New – Amazon EC2 M2 Pro Mac Instances Built on Apple Silicon M2 Pro Mac Mini Computers

Today, we are announcing the general availability of Amazon EC2 M2 Pro Mac instances. These instances deliver up to 35 percent faster performance over the existing M1 Mac instances when building and testing applications for Apple platforms.

New EC2 M2 Pro Mac instances are powered by Apple M2 Pro Mac Mini computers featuring 12 core CPU, 19 core GPU, 32 GiB of memory, and 16 core Apple Neural Engine and uniquely enabled by the AWS Nitro System through high-speed Thunderbolt connections, offering these Mac mini computers as fully integrated and managed compute instances with up to 10 Gbps of Amazon VPC network bandwidth and up to 8 Gbps of Amazon EBS storage bandwidth. EC2 M2 Pro Mac instances support macOS Ventura (version 13.2 or later) as AMIs.

A Story of EC2 Mac Instances
When Jeff Barr first introduced Amazon EC2 Mac Instances in 2020, customers were surprised to be able to run macOS on Amazon EC2 to build, test, package, and sign applications developed with Xcode applications for the Apple platform, including macOS, iOS, iPadOS, tvOS, and watchOS.

In his keynote in AWS re:Invent 2020, Peter DeSantis revealed the secret to build EC2 Mac instances powered by the AWS Nitro System, which makes it possible to offer Apple Mac mini computers as fully integrated and managed compute instances with Amazon VPC networking and Amazon EBS storage, just like any other EC2 instances.

“We did not need to make any changes to the Mac hardware. We simply connected a Nitro controller via the Mac’s Thunderbolt connection. When you launch a Mac instance, your Mac-compatible Amazon Machine Image (AMI) runs directly on the Mac Mini, with no hypervisor. The Nitro controller sets up the instance and provides secure access to the network and any storage attached. And that Mac Mini can now natively use any AWS service.”

In July 2022, we introduced Amazon EC2 M1 Mac Instances built around the Apple-designed M1 System on Chip (SoC). Developers building for iPhone, iPad, Apple Watch, and Apple TV applications can choose either x86-based EC2 Mac instances or Arm-based EC2 M1 instances. If you want to re-architect your apps to natively support Macs with Apple Silicon using EC2 M1 instances, you can build and test your apps to deliver up to 60 percent better price performance over the EC2 Mac instances for iPhone and Mac app build workloads with all the benefits of AWS.

Many customers take advantage of EC2 Mac instances to deliver a complete end-to-end build pipeline on macOS on AWS. With EC2 Mac instances, they can scale their iOS build fleet; easily use custom macOS environments with AMIs; and debug any build or test failures with fully reproducible macOS environments.

Customers have reported up to 4x reduction in build times, up to 3x increase in parallel builds, up to 80 percent reduction in machine-related build failures, and up to 50 percent reduction in fleet size. They can continue to prioritize their time on innovating products and features while reducing the tedious effort required to manage on-premises macOS infrastructure.

To accelerate this innovation, EC2 Mac instances recently began to support replacing root volumes on a running EC2 Mac instance, enabling you to restore the root volume of an EC2 Mac instance to its initial launch state or to a specific snapshot, without requiring you to stop or terminate the instance.

You can also use in-place operating system updates from within the guest environment on EC2 M1 Mac instances to a specific or latest macOS version, including the beta version, by registering your instances with the Apple Developer Program. Developers can now integrate the latest macOS features into their applications and test existing applications for compatibility before public macOS releases.

Getting Started with EC2 M2 Pro Instances
As with other EC2 Mac instances, EC2 M2 Pro Mac instances also support Dedicated Host tenancy with a minimum host allocation duration of 24 hours to align with macOS licensing.

To get started, you should allocate a Mac-dedicated host, a physical server fully dedicated for your own use in your AWS account. After the host is allocated, you can launch, stop, and start your own macOS environment as one instance on that host for one dedicated host.

After the host is allocated, you can start an EC2 Mac instance on it. The procedure is no different from starting any EC2 instance type. Choose your macOS AMI version and select the mac2-m2pro.metal instance type in the Application and OS Images section.

In the Advanced details section, select Dedicated host in Tenancy and a dedicated host you just created in Tenancy host ID.

When you use EC2 Mac instances for the first time, you can use SSH to connect to the newly launched instance as usual or enable Apple Remote Desktop and start a VNC session to the EC2 instance. To learn more, see Sebastien’s series of articles to launch and connect your Mac instance.

When you no longer need the Mac dedicated host, you can terminate your running Mac instance and release the underlying host. Note again that after being allocated, a Mac dedicated host can only be released after 24 hours to align with Apple’s macOS licensing.

Now Available
Amazon EC2 M2 Pro Mac instances are available in the US West (Oregon) and US East (Ohio) AWS Regions, with additional regions coming soon.

To learn more or get started, see Amazon EC2 Mac Instances or visit the EC2 Mac documentation.  You can send feedback to AWS re:Post for EC2 or through your usual AWS Support contacts.

Channy


from AWS News Blog https://ift.tt/Z0pi8PD
via IFTTT

New – NVMe Reservations for Amazon Elastic Block Store io2 Volumes

Amazon Elastic Block Store (Amazon EBS) io2 and io2 Block Express volumes now support storage fencing using NVMe reservations. As I learned while writing this post, storage fencing is used to regulate access to storage for a compute or database cluster, ensuring that just one host in the cluster has permission to write to the volume at any given time. For example, you can set up SQL Server Failover Cluster Instances (FCI) and get higher application availability within a single Availability Zone without the need for database replication.

As a quick refresher, io2 Block Express volumes are designed to meet the needs of the most demanding I/O-intensive applications running on Nitro-based Amazon Elastic Compute Cloud (Amazon EC2) instances. Volumes can be as big as 64 TiB, and deliver SAN-like performance with up to 256,000 IOPS/volume and 4,000 MB/second of throughput, all with 99.999% durability and sub-millisecond latency. The volumes support other advanced EBS features including encryption and Multi-Attach, and can be reprovisioned online without downtime. To learn more, you can read Amazon EBS io2 Block Express Volumes with Amazon EC2 R5b Instances Are Now Generally Available.

Using Reservations
To make use of reservations, you simply create an io2 volume with Multi-Attach enabled, and then attach it to one or more Nitro-based EC2 instances (see Provisioned IOPS Volumes for a full list of supported instance types):

If you have existing io2 Block Express volumes, you can enable reservations by detaching the volumes from all of the EC2 instances, and then reattaching them. Reservations will be enabled as soon as you make the first attachment. If you are running Windows Server using AMIs data-stamped 2023.08 or earlier you will need to install the aws_multi_attach driver as described in AWS NVMe Drivers for Windows Instances.

Things to Know
Here are a couple of things to keep in mind regarding NVMe reservations:

Operating System Support – You can use NVMe reservations with Windows Server (2012 R2 and above, 2016, 2019, and 2022), SUSE SLES 12 SP3 and above, RHEL 8.3 and above, and Amazon Linux 2 & later (read NVMe reservations to learn more).

Cluster and Volume Managers – Windows Server Failover Clustering is supported; we are currently working to qualify other cluster and volume managers.

Charges – There are no additional charges for this feature. Each reservation counts as an I/O operation.

Jeff;


from AWS News Blog https://ift.tt/S4lnBYx
via IFTTT

Monday, September 18, 2023

AWS Weekly Roundup: C7i Instances, Knowledge Base for Amazon Bedrock, and More (Sept. 18, 2023)

While daylight is getting shorter in the Northern hemisphere, we’ve got two new EC2 instance types optimized for compute and memory and many new capabilities for other services. Last week there was also the EMEA AWS Heroes Summit in Munich, an amazing day full of insights and passion. Here’s a nice picture of the participants!

AWS Heroes Summit EMEA 2023 in Munich

Last Week’s Launches
Here are some of the launches that caught my attention last week:

C7i Instances – Powered by custom 4th Generation Intel Xeon Scalable processors (code-named Sapphire Rapids) and available only on AWS, these compute-optimized instances offer up to 15 percent better performance over comparable x86-based Intel processors used by other cloud providers. A great choice for all compute-intensive workloads, such as batch processing, distributed analytics, high performance computing (HPC), ad serving, highly scalable multiplayer gaming, and video encoding, C7i instances deliver up to 15 percent better price performance versus C6i instances.

vCPUs
Memory (GiB)
Network Bandwidth
EBS Bandwidth
c7i.large 2 4 Up to 12.5 Gbps Up to 10 Gbps
c7i.xlarge 4 8 Up to 12.5 Gbps Up to 10 Gbps
c7i.2xlarge 8 16 Up to 12.5 Gbps Up to 10 Gbps
c7i.4xlarge 16 32 Up to 12.5 Gbps Up to 10 Gbps
c7i.8xlarge 32 64 12.5 Gbps 10 Gbps
c7i.12xlarge 48 96 18.75 Gbps 15 Gbps
c7i.16xlarge 64 128 25 Gbps 20 Gbps
c7i.24xlarge 96 192 37.5 Gbps 30 Gbps
c7i.48xlarge 192 384 50 Gbps 40 Gbps
c7i.metal-24xl* 96 192 37.5 Gbps 30 Gbps
c7i.metal-48xl* 192 384 50 Gbps 40 Gbps

*Bare metal instances are coming soon.

To facilitate efficient offload and acceleration of data operations and optimize performance for workloads, C7i instances support built-in Intel accelerators such as Data Streaming Accelerator (DSA), In-Memory Analytics Accelerator (IAA), QuickAssist Technology (QAT), and the new Intel Advanced Matrix Extensions (AMX) that accelerate matrix multiplication operations for applications such as CPU-based ML.

EC2 R7a Instances – Powered by 4th Gen AMD EPYC processors (code-named Genoa) with a maximum frequency of 3.7 GHz, these memory optimized instances deliver up to 50 percent higher performance compared to R6a instances and are ideal for high performance, memory-intensive workloads such as SQL and NoSQL databases, distributed web scale in-memory caches, in-memory databases, real-time big data analytics, and Electronic Design Automation (EDA) applications. Read more in Channy’s blog post.

Knowledge Base for Amazon Bedrock (Preview) – To deliver more relevant and contextual responses, Bedrock can now manage both the ingestion workflow and runtime orchestration to connect your organization’s private data sources to foundation models (FMs) and enable retrieval augmented generation (RAG) for your generative AI applications. To store data, you can choose from a range of vector databases including the vector engine for Amazon OpenSearch Serverless, Pinecone, and Redis Enterprise Cloud. Read more in Antje’s blog post.

High Query Rates with Amazon OpenSearch Serverless Extends Auto-Scaling – You can now rely on OpenSearch Serverless to help manage unpredictable surges in your search and query traffic and efficiently handle tens of thousands of query transactions per minute.

Amazon EMR on EKS – You can now improve resource utilization and simplify infrastructure management by using EMR to run Apache Flink (Public Preview) on the same Amazon EKS cluster as your other applications. Also, to provide a secure, stable, high-performance environment with the latest enhancements such as kernel, toolchain, glibc, and openssl, you can now use Amazon Linux 2023 as the operating system together with Java 17 as Java runtime to run your workloads with Amazon EMR on EKS.

Amazon Connect – Amazon Connect Cases now supports uploading attachments to a case, enabling agents to have the information they need at their fingertips in order to resolve cases, and displaying the author name for comments that are written on cases, to more easily track who contributed to the resolution of the case and collaborate more effectively. To receive near real-time stream of contact (voice calls, chat, and task) events (for example, call is queued) in a contact center, you can now subscribe to the new Contact Data Updated event.

Custom Notifications for AWS Chatbot – This lets you include additional information, such as number of orders or current throttling limits, when monitoring the health and performance of your AWS applications in Microsoft Teams and Slack channels.

AWS IAM Identity Center Session Duration Increased Up to 90 Days – You now have more flexibility based on your security context and desired end-user experience. Previously, the maximum duration was 7 days. The default session duration continues to be 8 hours and existing customer-configured session limits will remain unchanged.

Full Support of GraphQL APIs in Amplify Studio – You can now generate forms connected to your API, manage records in your API with Data Manager, and create data-bound Figma to React components for GraphQL APIs created with Amplify Studio or Amplify CLI. Previously, these data-powered features were only available when using Amplify DataStore.

Nested Filtering for AWS AppSync WebSockets-Based Subscriptions – You now have additional control over how data should be published out to connected clients by using filtering rules that allow you to target specific sub-items within the published data. Read more in this blog post.

API Gateway Console Refresh – There are usability improvements to REST and WebSocket API workflows (now visually aligned with the console experience of HTTP APIs) and dark mode support. Accessibility enhancements also help to better integrate with assistive technology.

Override Retention Capability for AWS Supply Chain – Manual forecast adjustments made by a demand planner are now automatically saved and reapplied from one planning cycle to the next.

Other AWS News

Serverless Development on AWS – Book CoverServerless Development on AWSAWS Hero Sheen Brisals and his colleague Luke Hedger revealed that they are sharing their expertise with a book that helps build enterprise-scale serverless solutions on AWS. The book outlines the adoption requirements in terms of people, mindset, and workloads, and details architectural patterns, security, and data best practices for building serverless applications.

More posts from AWS blogs – Here are a few posts from some of the other AWS and cloud blogs that I follow:

Upcoming AWS Events
Check your calendars and sign up for these AWS events:

AWS On Tour, Sept. 18-Oct. 6 – The AWS Developer Relations team is boarding a bus and traveling across European cities (London, Paris, Brussels, Amsterdam, Frankfurt, Zurich, Milan, Lyon, and Barcelona) to share their experiences and help you improve productivity.

AWS Global Summits, Sept. 26 – The last in-person AWS Summit of the year will be held in Johannesburg on Sept. 26.

CDK Day, Sept. 29Learn more at the website about this community-led fully virtual event with tracks in English and Spanish about CDK and related projects.

AWS re:Invent, Nov. 27-Dec. 1 – Browsing the session catalog is a nice way to start planning your re:Invent. Join us to hear the latest from AWS, learn from experts, and connect with the global cloud community.

AWS Community Days – Join a community-led conference run by AWS user group leaders in your region: Netherlands (Sept. 20), Spain (Sept. 23), Zimbabwe (Sept. 30), Peru (Sept. 30), Chile (Sept. 30), and Bulgaria (Oct. 7). Visit the landing page to check out all the upcoming AWS Community Days.

You can browse all upcoming AWS-led in-person and virtual events, and developer-focused events such as AWS DevDay.

Danilo

This post is part of our Weekly Roundup series. Check back each week for a quick roundup of interesting news and announcements from AWS!


from AWS News Blog https://ift.tt/QnJz8Hv
via IFTTT

Friday, September 15, 2023

Wednesday, September 13, 2023

Preview – Connect Foundation Models to Your Company Data Sources with Agents for Amazon Bedrock

In July, we announced the preview of agents for Amazon Bedrock, a new capability for developers to create generative AI applications that complete tasks. Today, I’m happy to introduce a new capability to securely connect foundation models (FMs) to your company data sources using agents.

With a knowledge base, you can use agents to give FMs in Bedrock access to additional data that helps the model generate more relevant, context-specific, and accurate responses without continuously retraining the FM. Based on user input, agents identify the appropriate knowledge base, retrieve the relevant information, and add the information to the input prompt, giving the model more context information to generate a completion.

Knowledge Base for Amazon Bedrock

Agents for Amazon Bedrock use a concept known as retrieval augmented generation (RAG) to achieve this. To create a knowledge base, specify the Amazon Simple Storage Service (Amazon S3) location of your data, select an embedding model, and provide the details of your vector database. Bedrock converts your data into embeddings and stores your embeddings in the vector database. Then, you can add the knowledge base to agents to enable RAG workflows.

For the vector database, you can choose between vector engine for Amazon OpenSearch Serverless, Pinecone, and Redis Enterprise Cloud. I’ll share more details on how to set up your vector database later in this post.

Primer on Retrieval Augmented Generation, Embeddings, and Vector Databases
RAG isn’t a specific set of technologies but a concept for providing FMs access to data they didn’t see during training. Using RAG, you can augment FMs with additional information, including company-specific data, without continuously retraining your model.

Continuously retraining your model is not only compute-intensive and expensive, but as soon as you’ve retrained the model, your company might have already generated new data, and your model has stale information. RAG addresses this issue by providing your model access to additional external data at runtime. Relevant data is then added to the prompt to help improve both the relevance and the accuracy of completions.

This data can come from a number of data sources, such as document stores or databases. A common implementation for document search is converting your documents, or chunks of the documents, into vector embeddings using an embedding model and then storing the vector embeddings in a vector database, as shown in the following figure.

Knowledge Base for Amazon Bedrock

The vector embedding includes the numeric representations of text data within your documents. Each embedding aims to capture the semantic or contextual meaning of the data. Each vector embedding is put into a vector database, often with additional metadata such as a reference to the original content the embedding was created from. The vector database then indexes the vectors, which can be done using a variety of approaches. This indexing enables quick retrieval of relevant data.

Compared to traditional keyword search, vector search can find relevant results without requiring an exact keyword match. For example, if you search for “What is the cost of product X?” and your documents say “The price of product X is […]”, then keyword search might not work because “price” and “cost” are two different words. With vector search, it will return the accurate result because “price” and “cost” are semantically similar; they have the same meaning. Vector similarity is calculated using distance metrics such as Euclidean distance, cosine similarity, or dot product similarity.

The vector database is then used within the prompt workflow to efficiently retrieve external information based on an input query, as shown in the figure below.

Knowledge Base for Amazon Bedrock

The workflow starts with a user input prompt. Using the same embedding model, you create a vector embedding representation of the input prompt. This embedding is then used to query the database for similar vector embeddings to return the most relevant text as the query result.

The query result is then added to the prompt, and the augmented prompt is passed to the FM. The model uses the additional context in the prompt to generate the completion, as shown in the following figure.

Knowledge Stores for Amazon Bedrock

Similar to the fully managed agents experience I described in the blog post on agents for Amazon Bedrock, the knowledge base for Amazon Bedrock manages the data ingestion workflow, and agents manage the RAG workflow for you.

Get Started with Knowledge Bases for Amazon Bedrock
You can add a knowledge base by specifying a data source, such as Amazon S3, select an embedding model, such as Amazon Titan Embeddings to convert the data into vector embeddings, and a destination vector database to store the vector data. Bedrock takes care of creating, storing, managing, and updating your embeddings in the vector database.

If you add knowledge bases to an agent, the agent will identify the appropriate knowledge base based on user input, retrieve the relevant information, and add the information to the input prompt, providing the model with more context information to generate a response, as shown in the figure below. All information retrieved from knowledge bases comes with source attribution to improve transparency and minimize hallucinations.

Knowledge Base for Amazon Bedrock

Let me walk you through those steps in more detail.

Create a Knowledge Base for Amazon Bedrock
Let’s assume you’re a developer at a tax consulting company and want to provide users with a generative AI application—a TaxBot—that can answer US tax filing questions. You first create a knowledge base that holds the relevant tax documents. Then, you configure an agent in Bedrock with access to this knowledge base and integrate the agent into your TaxBot application.

To get started, open the Bedrock console, select Knowledge base in the left navigation pane, then choose Create knowledge base.

Knowledge Base for Amazon Bedrock

Step 1 – Provide knowledge base details. Enter a name for the knowledge base and a description (optional). You also must select an AWS Identity and Access Management (IAM) runtime role with a trust policy for Amazon Bedrock, permissions to access the S3 bucket you want the knowledge base to use, and read/write permissions to your vector database. You can also assign tags as needed.

Knowledge Base for Amazon Bedrock

Step 2 – Set up data source. Enter a data source name and specify the Amazon S3 location for your data. Supported data formats include .txt, .md, .html, .doc and .docx, .csv, .xls and .xlsx, and .pdf files. You can also provide an AWS Key Management Service (AWS KMS) key to allow Bedrock to decrypt and encrypt your data and another AWS KMS key for transient data storage while Bedrock is converting your data into embeddings.

Choose the embedding model, such as Amazon Titan Embeddings – Text, and your vector database. For the vector database, as mentioned earlier, you can choose between vector engine for Amazon OpenSearch Serverless, Pinecone, or Redis Enterprise Cloud.

Knowledge Base for Amazon Bedrock

Important note on the vector database: Amazon Bedrock is not creating a vector database on your behalf. You must create a new, empty vector database from the list of supported options and provide the vector database index name as well as index field and metadata field mappings. This vector database will need to be for exclusive use with Amazon Bedrock.

Let me show you what the setup looks like for vector engine for Amazon OpenSearch Serverless. Assuming you’ve set up an OpenSearch Serverless collection as described in the Developer Guide and this AWS Big Data Blog post, provide the ARN of the OpenSearch Serverless collection, specify the vector index name, and the vector field and metadata field mapping.

Knowledge Base for Amazon Bedrock

The configuration for Pinecone and Redis Enterprise Cloud is similar. Check out this Pinecone blog post and this Redis Inc. blog post for more details on how to set up and prepare their vector database for Bedrock.

Step 3 – Review and create. Review your knowledge base configuration and choose Create knowledge base.

Knowledge Base for Amazon Bedrock

Back in the knowledge base details page, choose Sync for the newly created data source, and whenever you add new data to the data source, to start the ingestion workflow of converting your Amazon S3 data into vector embeddings and upserting the embeddings into the vector database. Depending on the amount of data, this whole workflow can take some time.

Knowledge Base for Amazon Bedrock

Next, I’ll show you how to add the knowledge base to an agent configuration.

Add a Knowledge Base to Agents for Amazon Bedrock
You can add a knowledge base when creating or updating an agent for Amazon Bedrock. Create an agent as described in this AWS News Blog post on agents for Amazon Bedrock.

For my tax bot example, I’ve created an agent called “TaxBot,” selected a foundation model, and provided these instructions for the agent in step 2: “You are a helpful and friendly agent that answers US tax filing questions for users.” In step 4, you can now select a previously created knowledge base and provide instructions for the agent describing when to use this knowledge base.

Knowledge Base for Amazon Bedrock

These instructions are very important as they help the agent decide whether or not a particular knowledge base should be used for retrieval. The agent will identify the appropriate knowledge base based on user input and available knowledge base instructions.

For my tax bot example, I added the knowledge base “TaxBot-Knowledge-Base” together with these instructions: “Use this knowledge base to answer tax filing questions.”

Once you’ve finished the agent configuration, you can test your agent and how it’s using the added knowledge base. Note how the agent provides a source attribution for information pulled from knowledge bases.

Knowledge Base for Amazon Bedrock

Generative AI with large language modelsLearn the Fundamentals of Generative AI
Generative AI with large language models (LLMs) is an on-demand, three-week course for data scientists and engineers who want to learn how to build generative AI applications with LLMs, including RAG. It’s the perfect foundation to start building with Amazon Bedrock. Enroll for generative AI with LLMs today.

Sign up to Learn More about Amazon Bedrock (Preview)
Amazon Bedrock is currently available in preview. Reach out through your usual AWS support contacts if you’d like access to knowledge bases for Amazon Bedrock as part of the preview. We’re regularly providing access to new customers. To learn more, visit the Amazon Bedrock Features page and sign up to learn more about Amazon Bedrock.

— Antje


from AWS News Blog https://ift.tt/8Kxn59r
via IFTTT